When the weather gets chilly, we all crave something warm, comforting, and satisfying. But what if you don’t want to turn on the oven? Whether you’re traveling, staying in a camper, or just avoiding extra heat in the kitchen, these no-bake winter recipes will keep you cozy and full.
2 Easy Food Recipe for road trips
Hit the road with flavor and simplicity! This mini recipe collection includes a warm potato omelette and a light chicken salad — both easy to make, travel-friendly, and perfect for cozy road trip meals.
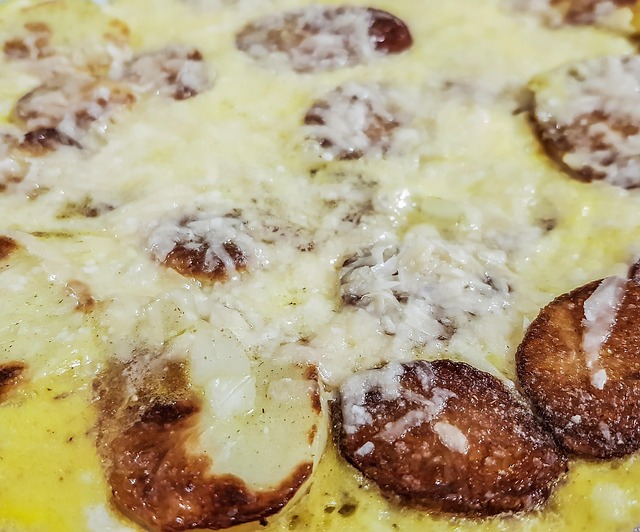
Potatoes omelette recipe
You have probably eaten a lot of omelettes before – veggies, ham, cheese variations, but have you ever added potatoes to the list? This is a dish we love doing on the road, it takes a bit more time than the classic omelette but it’s such a delight to eat and keeps you full for on the road.
Ingredients list:
- eggs – I use for one portion 2 eggs
- Condiments – salt, pepper, paprika, herbs
- 2 medium potatoes or as many as you want if they pre-cleaned and pre-cut.
- Butter/Oil for the pan
- Optional: Milk for the eggs
- Optional: Veggies, cheese, ham, bacon
How to prepare:
First prepare your potatoes. Clean, peel and cut them in smaller sized cubes, not too small to smush but small enough to cook evenly in the pan. Condiment your potatoes to your liking, I add salt some herbs (italian mix) and smoked paprika and put them in the heated pan with butter. Make sure they cook thoroughly before you add your eggs.
If you use optional veggies and meat, you can add them a bit before your potatoes get fully cooked. I add the eggs to the mixture and then scramble them with the potatoes, but you can also beat your eggs separately in a bowl with a fork and then add them on top of the potatoes. Season your eggs to your liking and add your optional cheese as topping and let it melt. Remove pan from heat and serve with pickles, sauces and beverage of choice. You just made a full, delicious one pan meal.
Beof Salad recipe
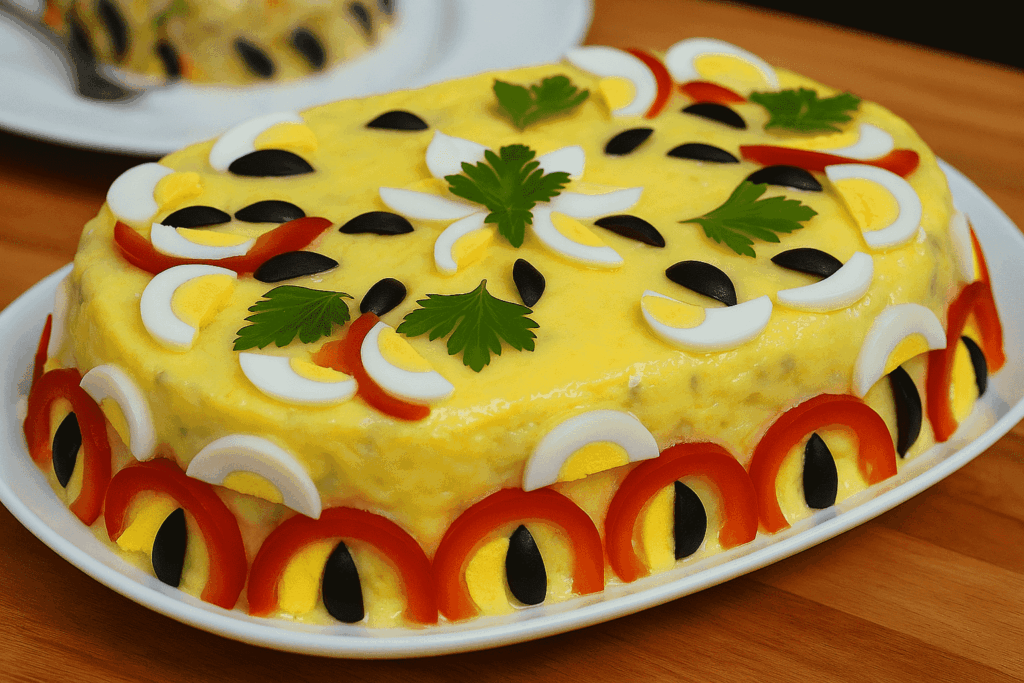
There is not a single salad that will top this one for me. I’ve been eating it since childhood days and it still stands as my favorite of all times salad dish. It’s fresh, it’s packed with protein and so creamy and textured. Be aware it is more labor heavy than other salads because you will need to boil your chicken and veggies and afterwards assemble it with a home made mayo (or store-bought, favorite mayo brand).
Ingredients list: This is for a big portion of salad, I recommend to almost half the ingredients if it’s your first time eating a salad like this.
- 600 g chicken breasts
- 200 g home made mayo or store-bought mayo
- 8 potatoes
- 2 bigger carrots
- 1 parsley root – optional, we don’t always use it
- 1 parsnip
- 1 jar of pickled cucumbers – if you like the taste of pickles maybe go for 1 and half jars
- Condiments: salt, pepper, Delikat or vegeta
- Optional: Shredded cheese and boiled eggs for decoration on top
How to prepare:
Use a bigger pot or two smaller pots and boil your veggies and chicken. Boil your potatoes with the skin on but you should clean the carrots and root veggies. You don’t need to season the water since we will heavily season the salad after combing everything.
Once your veggies and chicken are boiled and have cooled off for a bit, you can start cutting them in small cube shapes. I have never tried a chopper with boiled veggies, but if it works let me know!
Once everything is cut, transfer in a big bowl and start seasoning with your preferred powders, but don’t season it to perfection just yet, wait after you’ve added the cut pickles in cubes and mayo to have another taste. If after adding the pickles and mayo is still missing some seasoning then you can go ahead and add it. You can serve it right away or store it in the fridge for later. We add shredded cheese on top for decoration. Bon appetite!
3 No-Bake Dessert recipe!
What’s better than delicious, easy desserts for when the days are shorter and colder and want that dab of festive fun while camping with no oven. I will share one of my favorite childhood deserts to prepare that will last for a few days. The best part – you can prepare fresh without an oven! If you need an alternative to coffee, you can check out this yerba mate who promotes sustainable energy
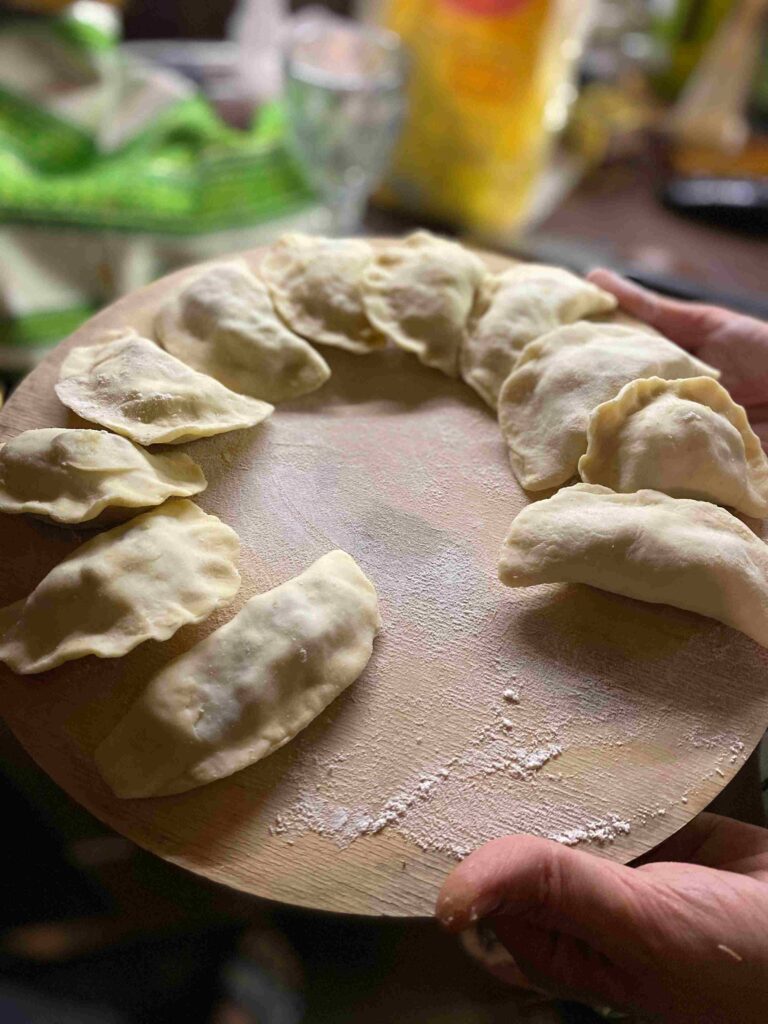
Sweet Cheese Dumplings recipe with cinnamon and brown sugar sprinkled on top
This is a staple dessert from my childhood, my mom used to make it in winter time because it’s warm, soft and so easy to do with minimal ingredients.
Ingredients list:
Dough:
- 500 g white flour
- 200 ml water, slightly warm but not hot
- 3 spoons of oil
- 1 teaspoon of salt
- 1 medium sized egg
Filling:
- around 500g of sweet cheese or cottage cheese for extra texture
- 1-2 eggs depending how thick the cheese is. I usually use 1 egg
- 4 spoons of sugar of your choice – can add more if you using cottage cheese
- some vanilla extract
For serving:
- Brown sugar and cinnamon sprinkled on top
- Can use cold soft cream cheese like Philadelphia
How to prepare:
Dough: Add the dry ingredients to a bigger bowl, make a dent in the middle and add the egg and oil. Mix the dough with your clean hands or a spatula. Once it starts crumbling start slowly adding the water bit by bit while stirring to incorporate it well. Knead the dough until everything is smoothly combined and put it aside.
Filling: In the same bowl as your dough or a different one add your cheese, sugar and egg and mix. Add your vanilla extract and taste the filling if it needs extra sugar.
Assemble: Divide the dough in two and roll one part not too thick. Use a cup to cut circles or a knife to cut squares depending how you want your dumplings to look. Add the filling into the middle and carefully stretch it closed and apply pressure on the edges to tie them together.
Use the fork to press in the edges fully tight and create a cute pattern. Put your water to boil in a pot half way through. You will add the dumplings into boiling water and once they are fully cooked they will rise to the surface. Remove them from the water and drain as much as possible and while hot add the sugar and cinnamon on top. Eat them warm.
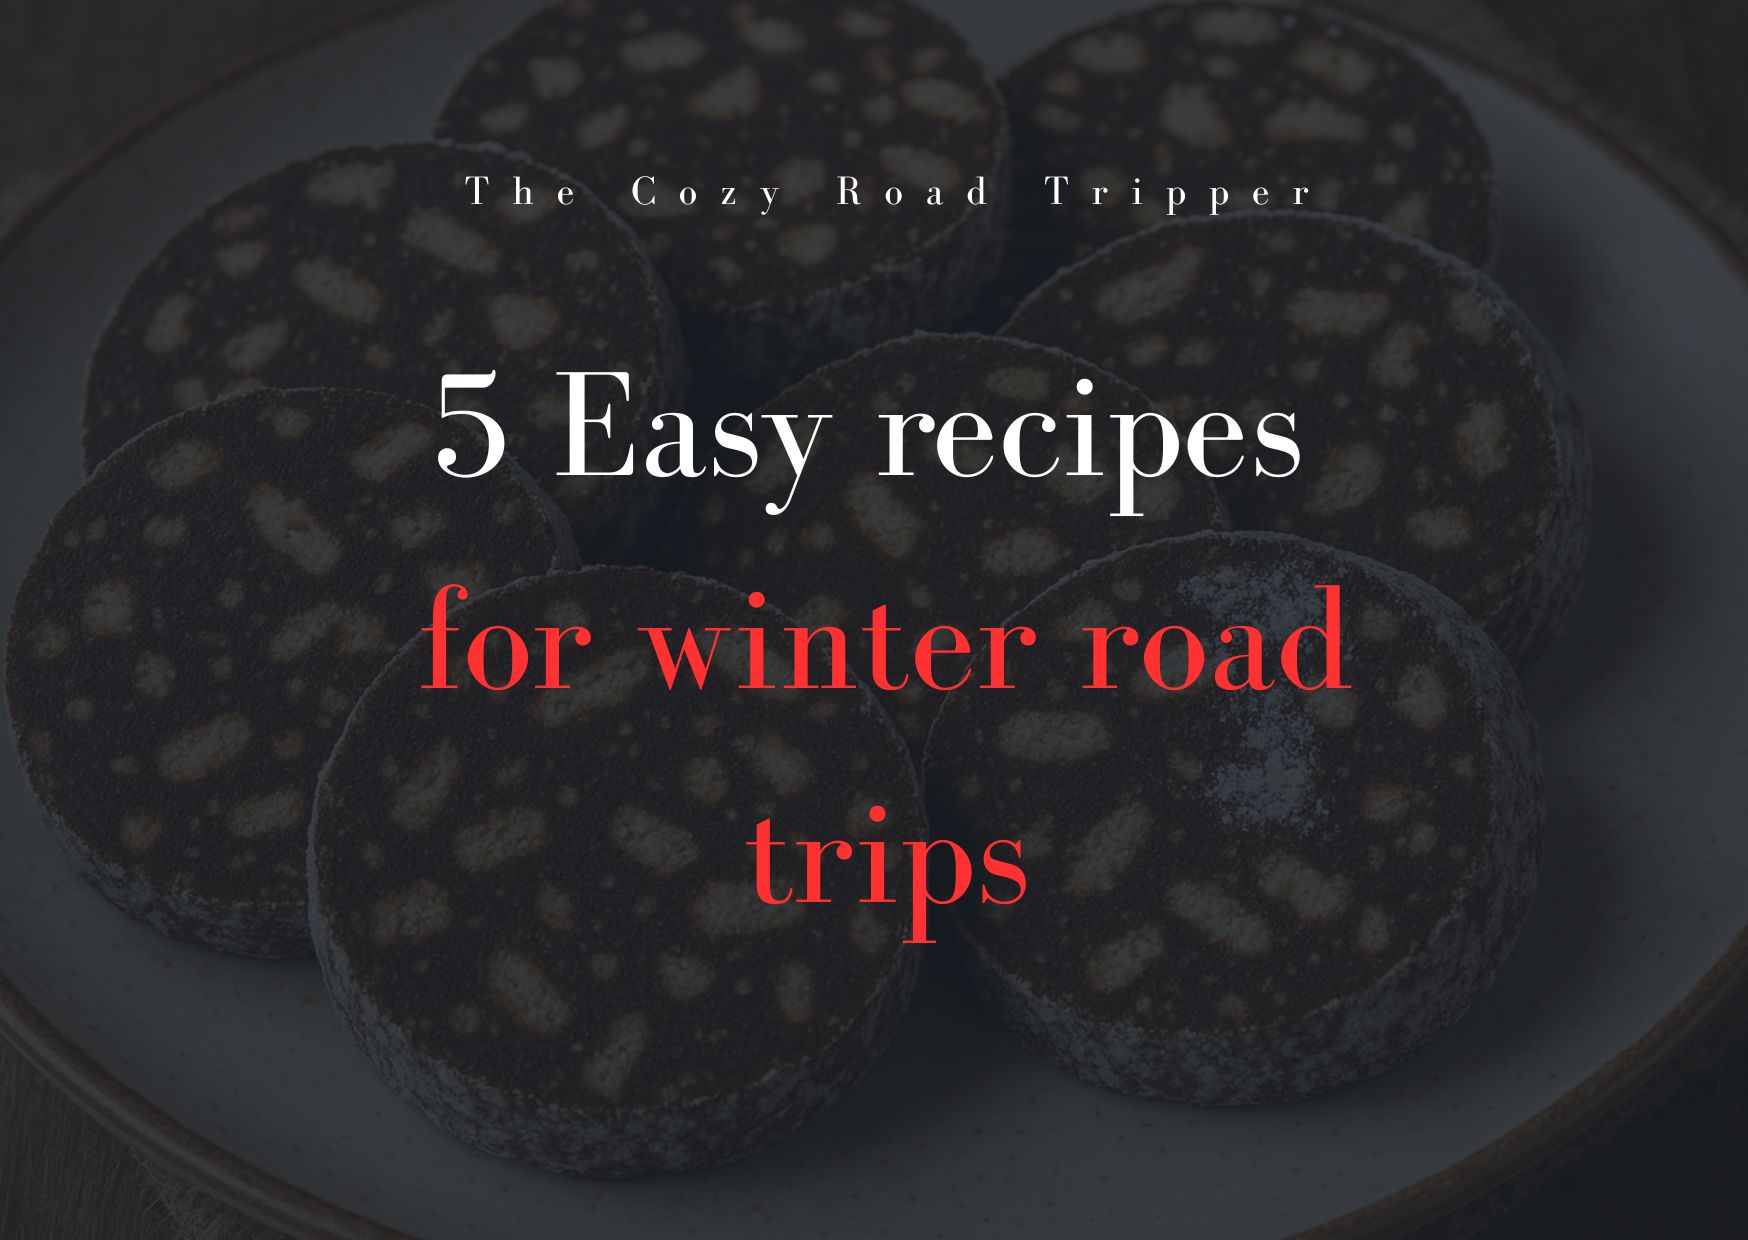
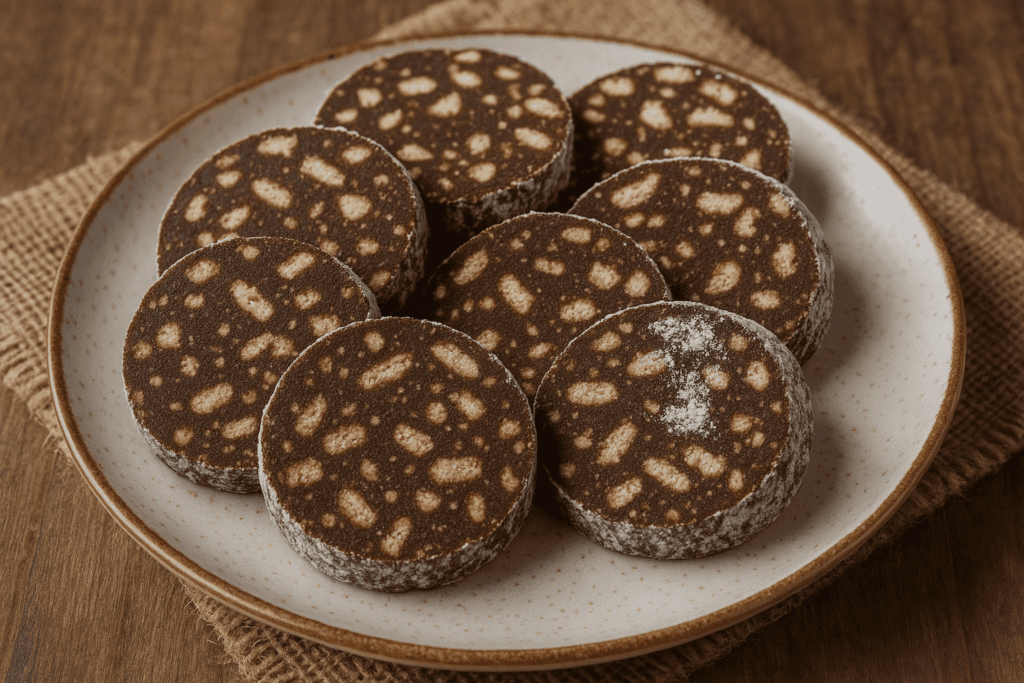
Cocoa Biscuit Sausage/Salami recipe
I can’t honestly imagine a Christmas dinner without a cocoa biscuit sausage. They are so so delicious and require no baking. They make the perfect snack for on the road since they don’t crumble or make a mess when eating and can last without being in the fridge.
Ingredients list:
- 500 g biscuits – we use butter biscuits
- 200 ml milk
- 150 g butter
- 100 g raisins
- 100 g white sugar
- shredded coconut
- 2 spoons cocoa
- Turkish delight – we use it a lot, if you can’t find it you can skip adding it
- rom extract
How to prepare:
In the pan on low heat add your milk and let it warm up and then add your butter cut in small cubes. Let the butter melt and incorporate with the milk. In the meanwhile, break your biscuits in small pieces with your hands in a big bowl. Once the milk and butter are done add the cocoa powder, rom extract and resins and mix it all well together. Pour the mixture over the biscuits and mix with a spoon or spatula since its hot. This is when you add the Turkish delight if you are using it and mix it in slowly.
Roll a long strip of plastic wrap, around how long you want your cocoa biscuit sausage to be and sprinkle the shredded coconut on it. Add your mixture on top and roll the wrap horizontally to create a sausage shape. You can also use a sushiroll here. Leave the rolls in a cold spot for a few hours to harden up, ideally overnight. Cut it up in slices and enjoy with a cup of hot chocolate or coffee.
Raffaello style cake balls recipe
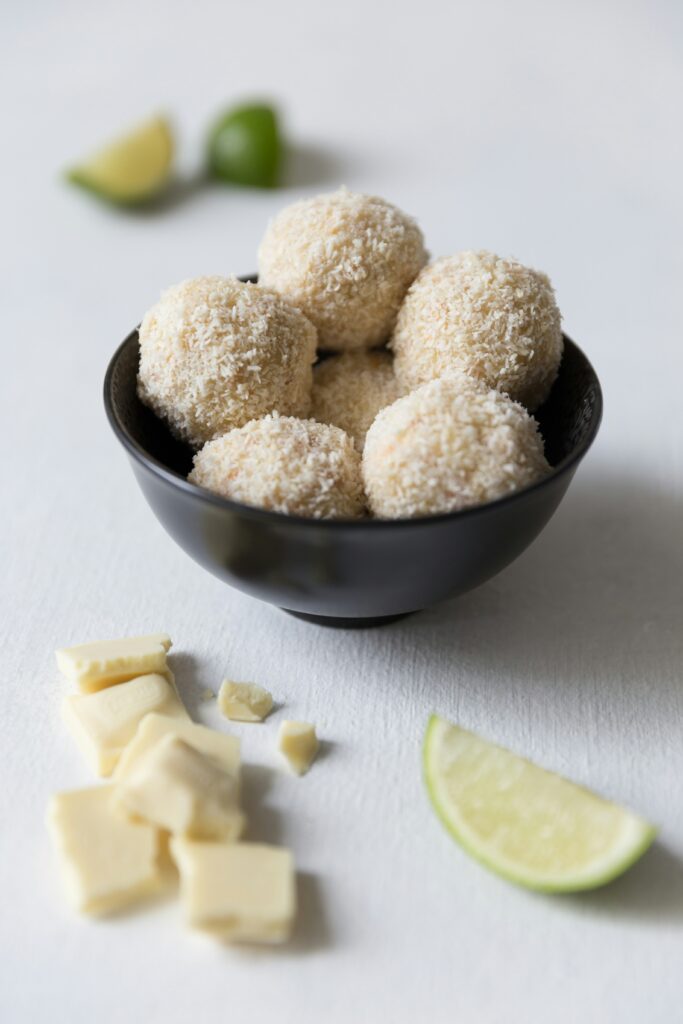
Ingredients list:
- 250 g shredded coconut – 190 for the cake and 50-70 for decoration
- 150 g roasted almonds
- 1 can of sweetened condensed milk of approx. 400g
How to prepare:
You will weight 190g of the shredded coconut and add the condensed milk on top and mix it well until well incorporated. You will grab small portions from the mixture and form balls using your hands. Grab one almond and push it into the middle of the ball using the pointy part of the almond and then roll it between your hands again to restore the round shape and for the almond to be fully covered. In another bowl add the rest of the shredded coconut and roll the ball into it, covering it fully. Repeat until you’ve used all your mixture. Can be enjoyed immediately.
Share how it turned out with us! I can’t wait to read your thoughts!
You don’t need an oven to enjoy delicious, heartwarming winter foods. These recipes are simple, travel-friendly, and made for cozy days, whether you’re at home, on the road, or in tent.